
 Home
Home 

How to configure personal computers with Windows 10 or 11 for Internet access by the wired Ethernet at the students' dormitories of Studierendenwerk Bielefeld
This manual describes how to configure Windows 10 or 11 by three steps for Internet access respectively wired 802.1X- authentication, which is a precondition.
Preparations
Please first deactivate the wireless module of your computer (switch at the notebook, special function key etc.). The Studentenwerk does not operate wireless LAN in its dormitories.Remove the ethernet cable from your computer.
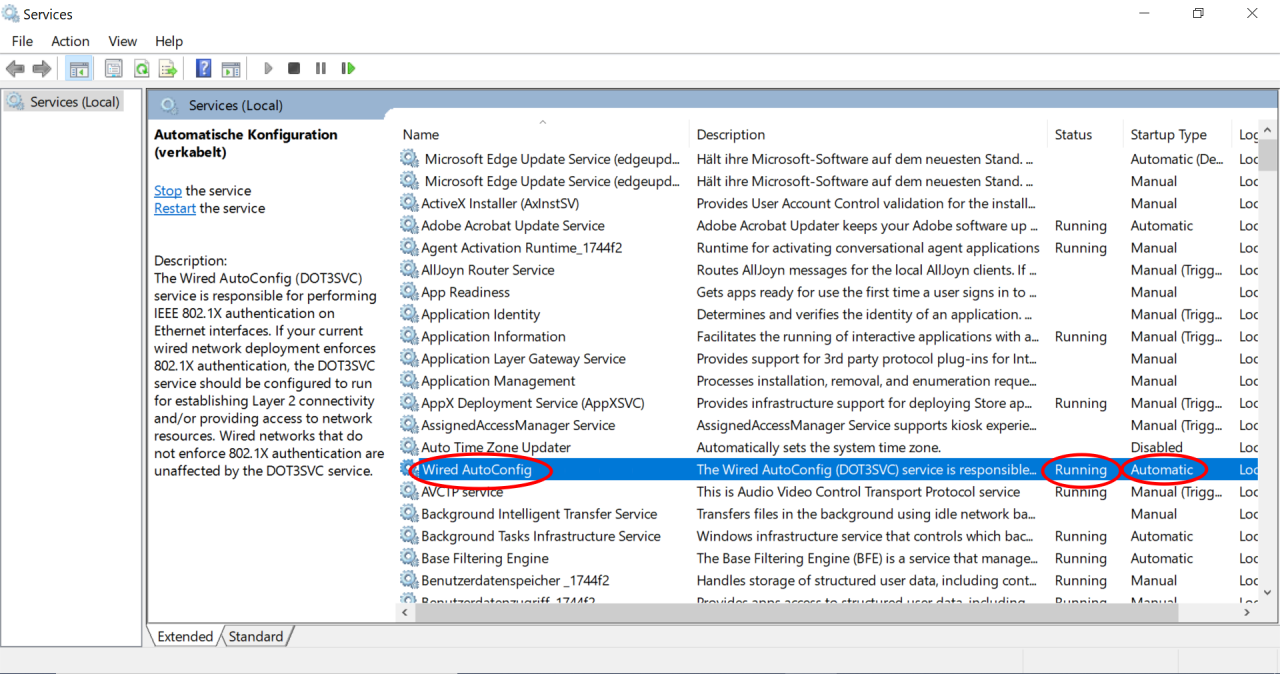
1) Starting the 802.1x authentication service
The service responsible for the 802.1x-authentication on Ethernet LAN must be activated first on Windows. Open the services panel. Your Windows will display a long list of services. Locate the service 'wired autoconfig'. In the description of the service (second column) you will always find the code ' IEEE 802.1x' in latin characters. Attention: Please do not confuse this service with the service for the wireless network (wlan).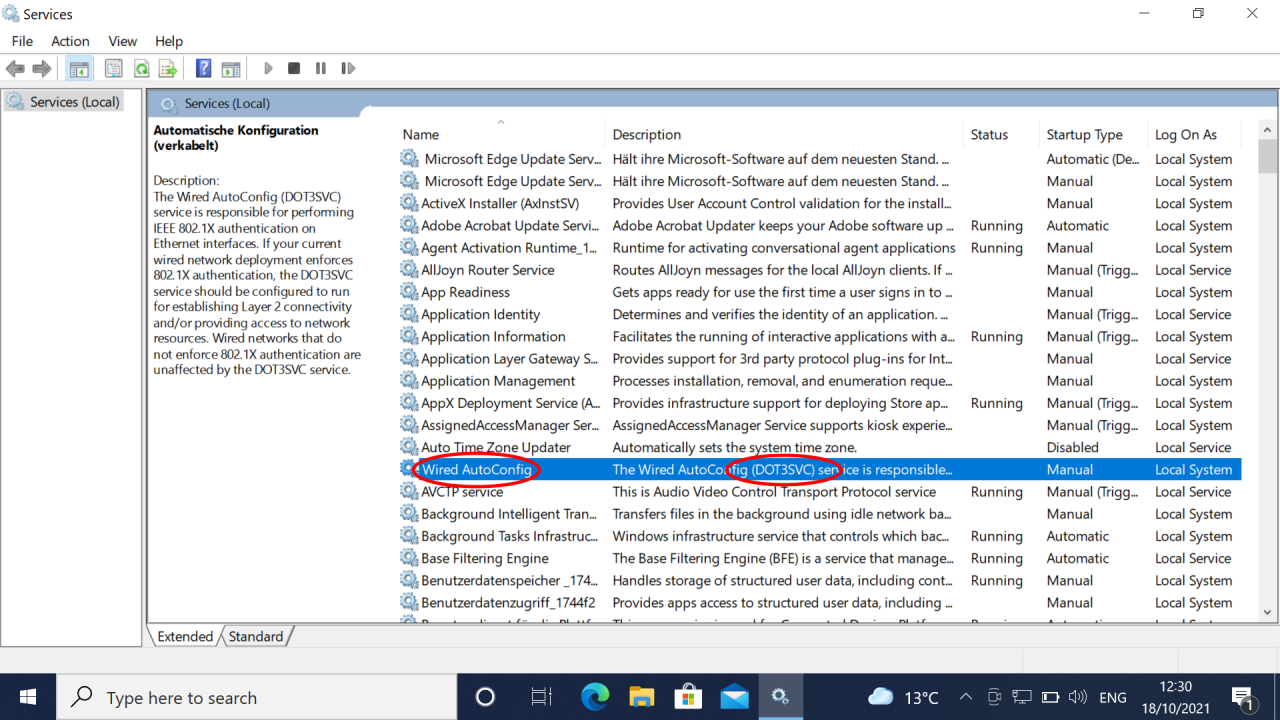
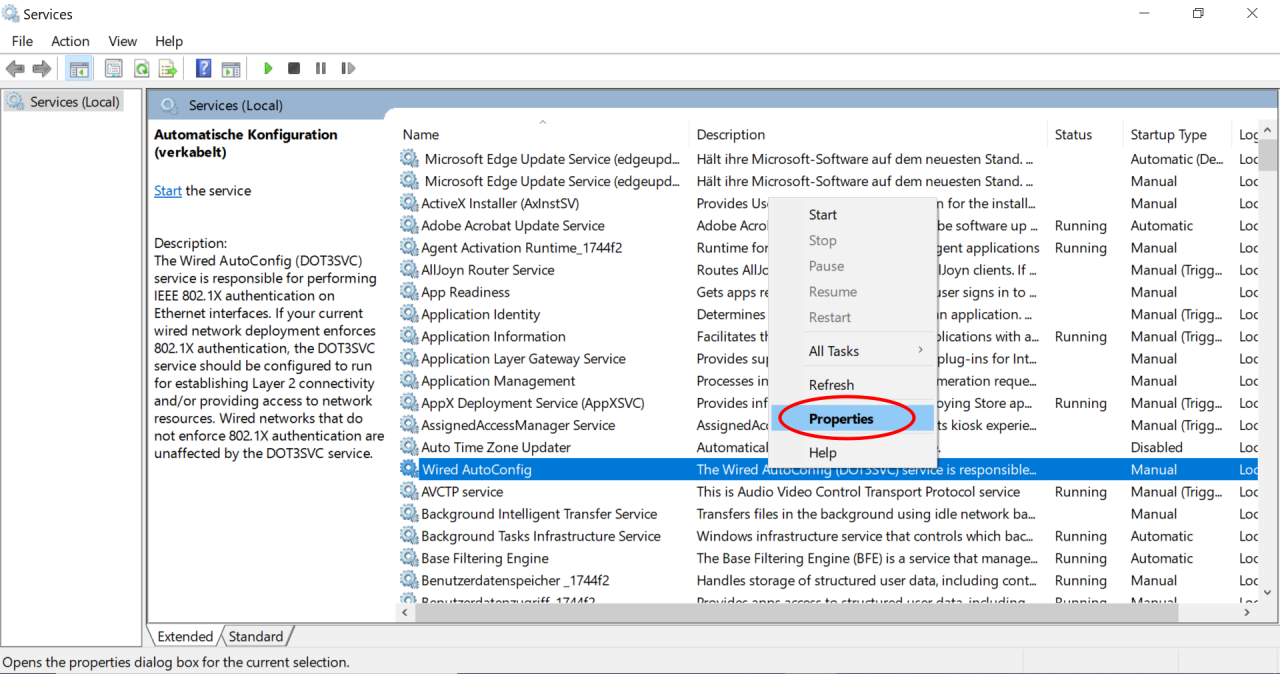
Select the context menu 'properties' to the service (right click on the service or menu 'action' > 'properties').
Choose 'automatic' for startup type.
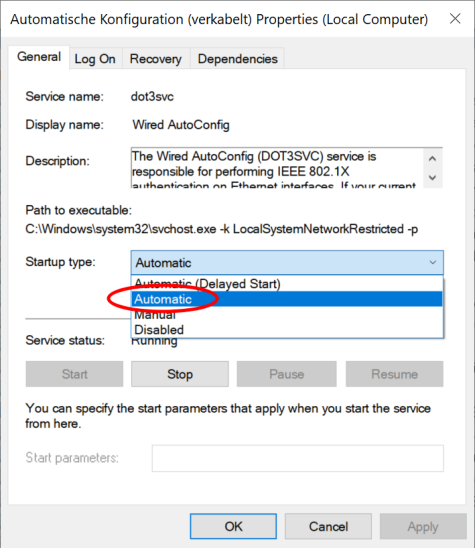
From now on this service will be started automatically by Windows at each system startup. Click once on the button 'Start' to start the service now without rebooting your system.
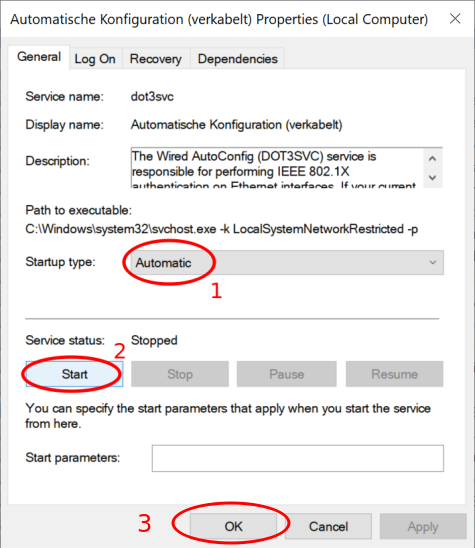
For the service 'wired autoconfig' now 'start' and 'automatic' should appear.
This completes the first part of the configuration. You can close all windows now.
2) LAN-configuration:
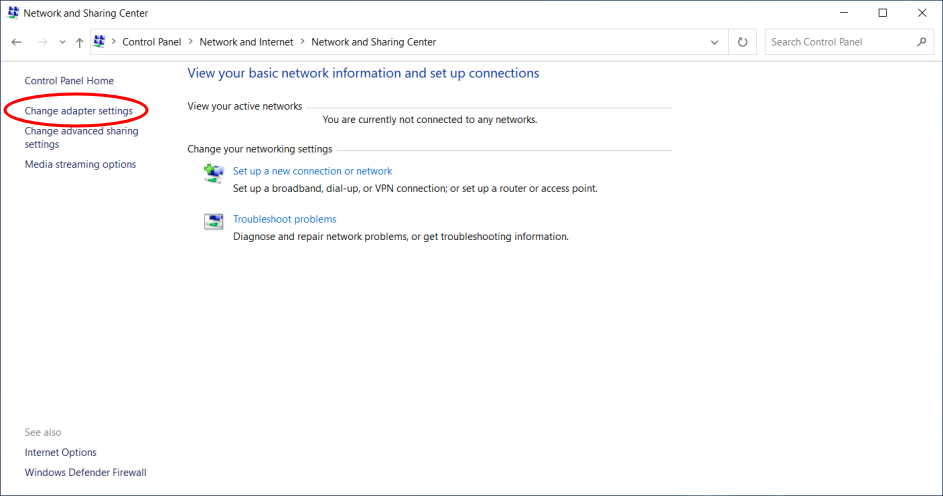
Open the system control panel. From here go to 'Network and Internet'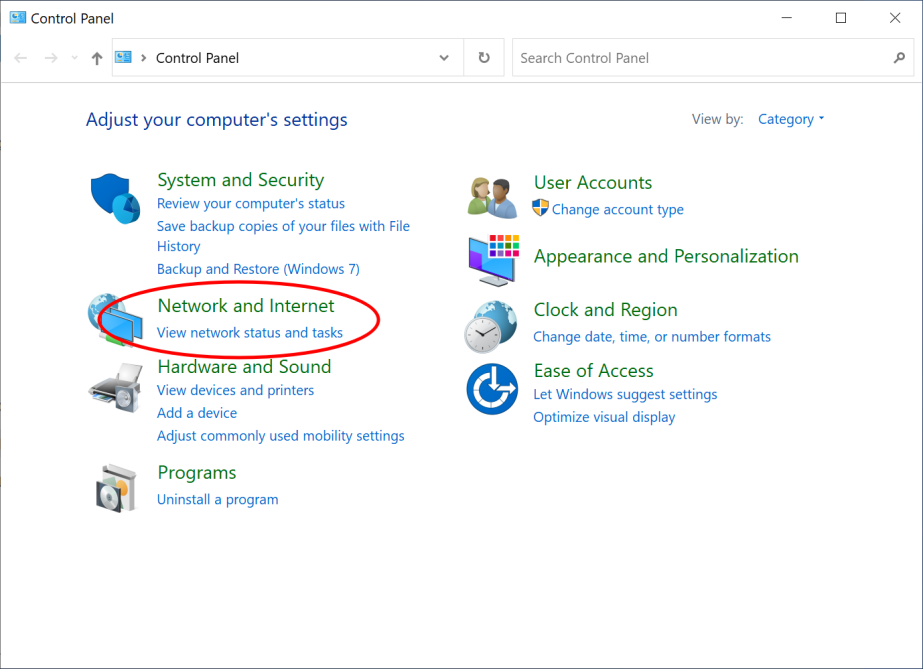
and then choose 'Change adapter settings'.
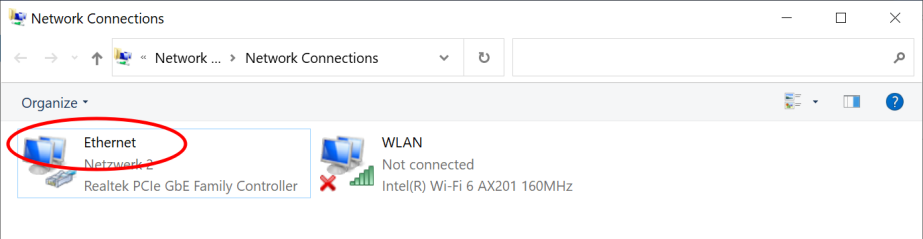
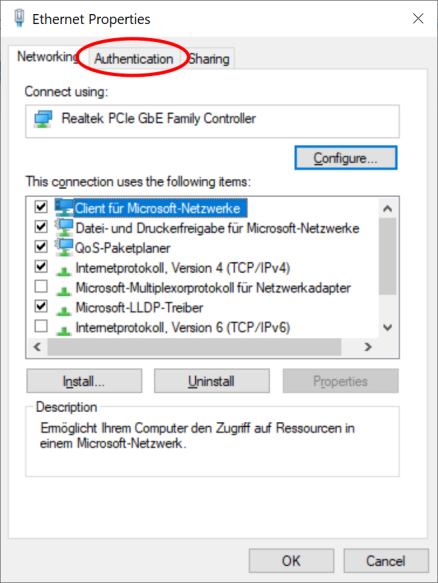
Here you'll see one or more network connections. This depends on the features of your computer. Select the properties of the wired 'Ethernet' by double-clicking or right-click .
The tab 'Authentication' is only available if you have started the service 'wired autoconfig' according to the first part of this guide. If the tab 'Authentication' is missing, then the first step has failed and must be repeated again. Choose the tab 'Authentication'.
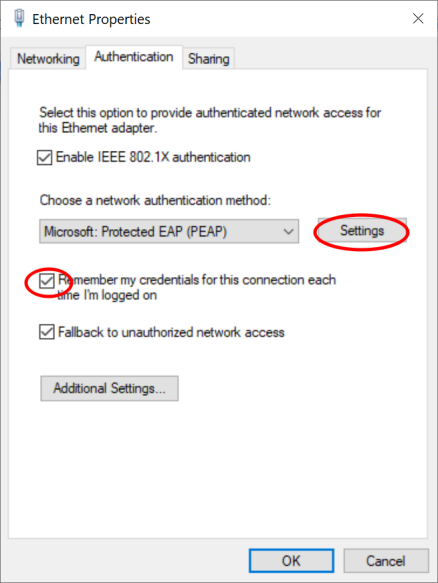
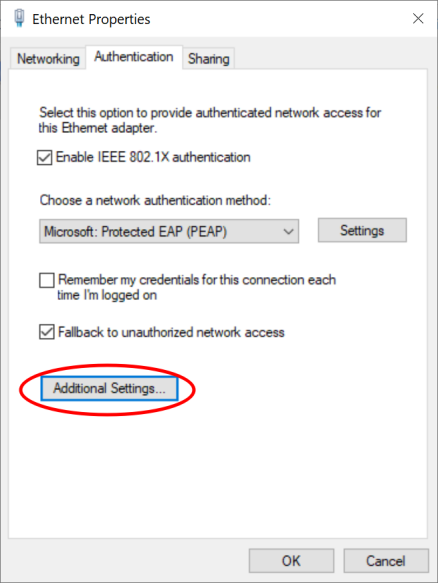
Enable the 'IEEE 802.1X-Authentifizierung' and 'Remember my credentials for this connection each time I'm logged on'. Then choose 'Settings'.
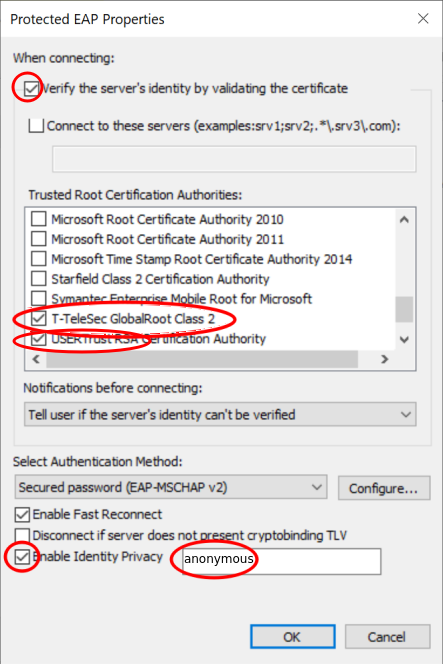
Students of Bielefeld University:
In the following window please enable 'Verify the server's identity' and the root certificate 'USERTrust RSA Certification Authority', choose 'Secured password (EAP-MSCHAP v2)' as method for network authentication, check 'Enable Identity Privacy' and type 'anonymous' into the form. Then choose 'Configure'.
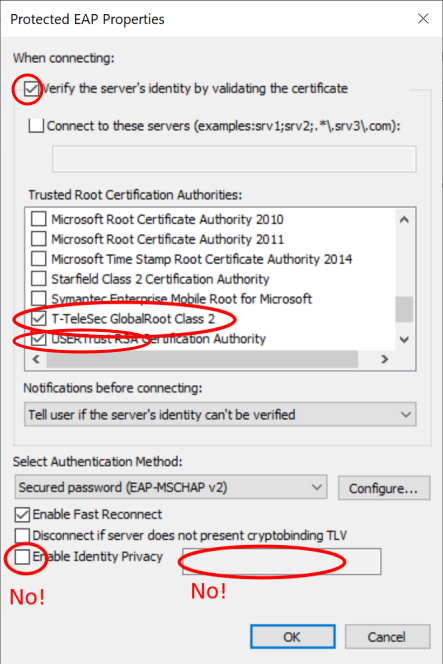
Students of Hochschule Bielefeld HSBI:
In the following window please enable 'Verify the server's identity' and the root certificate 'USERTrust RSA Certification Authority', choose 'Secured password (EAP-MSCHAP v2)' as method for network authentication, do not 'Enable Identity privacy' and leave the form empty. Then choose 'Configure'.
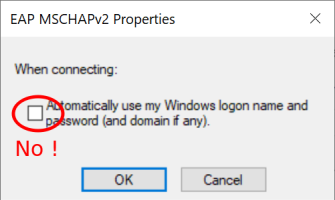
In the following window please deactivate 'Automatically use my Windows logon name and password (and domain if any)', because your logon name at Bielefeld University, Hochschule Bielefeld or Oberstufenkolleg usually is different from your Windows logon name.
Choose "OK" two times, which will bring you back to the Authentication tab.
Choose now 'Additional Settings'
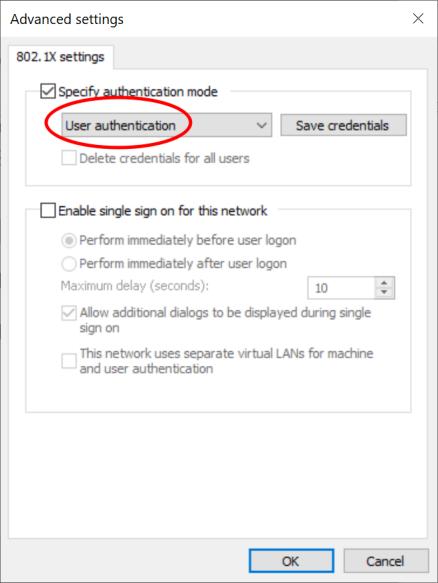
Enable 'Specify authentication mode' and choose 'User authentication'.
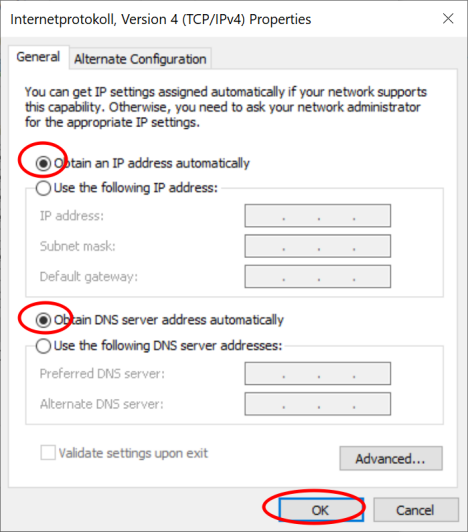
Go back once more to the window 'Local Area Connection Properties', choose the tab 'Networking', disable IPv6 and then choose the properties of 'Internet Protocol Version 4 (TCP/IPv4)'
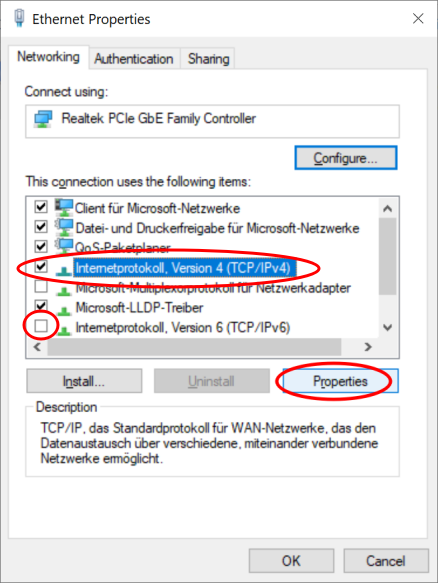
In any case enable 'Obtain an IP address automatically' and 'Obtain DNS server address automatically'
You have completed the second step and can close all windows now once again.
3) Authentication
Now connect your computer with the Ethernet cable to the network. An input mask appears, in which you enter your username@realm and your password from Universität Bielefeld, Hochschule Bielefeld or Oberstufenkolleg.The realm is "@uni-bielefeld.de" for all students of Bielefeld University and Oberstufenkolleg and "@hsbi.de" for students of Hochschule Bielefeld (Bielefeld University of Applied Sciences).
For example: Your name is Jane Doe, your login is "jdoe" and your are student of Bielefeld University, than you should type "jdoe@uni-bielefeld.de".
For example: Your name is Max Pattern, your login is "mpattern3" and your are student of Hochschule Bielefeld, than you should type "mpattern3@hsbi.de".
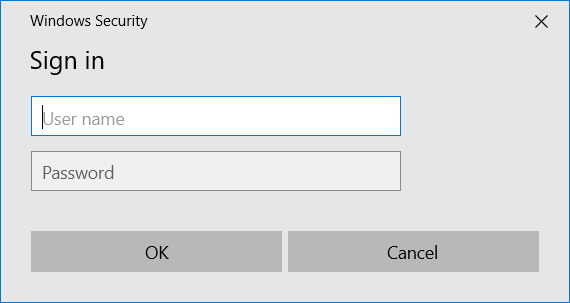
If the authentication failed because the pair of your username and password you entered was not correct for example or the authentication process from your Windows could not be completed within the prescribed period, however, the input mask will appear again.
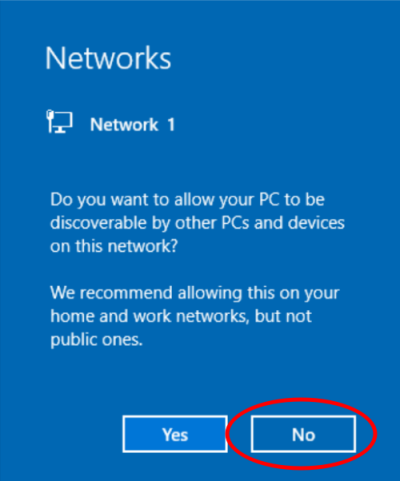
Finally, select "No" for public network.
Finished, your access to the Internet is established!
If you get no Internet access, even though the authentication was successful, please check again the IP settings for your Ethernet connection (see above) and start the authentication process again, by separating the computer from the network for a short time.